
When I got the mini pack of the Sheer Tints, I wasn’t sure exactly what I was going to do with them. Did that stop me from wanting them? Ha! I wasn’t really looking for anything at the time, but I was reading some reviews on them and saw some ideas at Phoenix Beauty Lounge.
I must say that I think I got more comments on this mani that I’ve ever had before. Of course, I routinely get comments from women, especially at places like Sally or Ulta because people there are more likely to be into that kind of stuff. But when the guy at Lowe’s notices them while cutting your PVC pipe, now that’s something!
I wasn’t completely happy with this one, but that was due to the crap job I did on the white polish (OPI Alpine Snow). I loved how the Sheer Tint effects turned out, so I’m going to do it again some time, but use a different lacquer for my undies. I’m thinking that one of my white jellies might be really nice and add even more delicacy to the look. I pretty much just used the Alpine Snow so I could get it out of the way and check it off of the review list.
It was really yucky, but I’m not laying all the blame on Alpine Snow’s doorstep. Opaque creme whites are probably one of the toughest colors there is as far as getting a good formula. If it’s not streaky, it’s globby, if it’s not runny, chalky. This pretty much had the consistency of Liquid Paper. But I’m willing to cut it a little slack, because it’s a mini bottle that I’ve had a long time so that could have a great deal to do with it being gunky, as well as using the tiny brush. And I’ll concede that it’s possible that there was some operator error involved as well. I’ve used it before and, while I’ve never been really thrilled with it, I don’t recall it being this bad.
Here’s the tremendously bad picture I took for posterity:

Now to the good stuff!
I described the whole idea behind the Sheer Tints in my previous post, but I’ll put in the picture again just for a reference point on the colors.

From left to right – I’m Never Amberrassed, Be Magentale With Me, Don’t Violet Me Down and I Can Teal You Like Me. Yeah, I know. They must stay awake at night thinking up this stuff…..
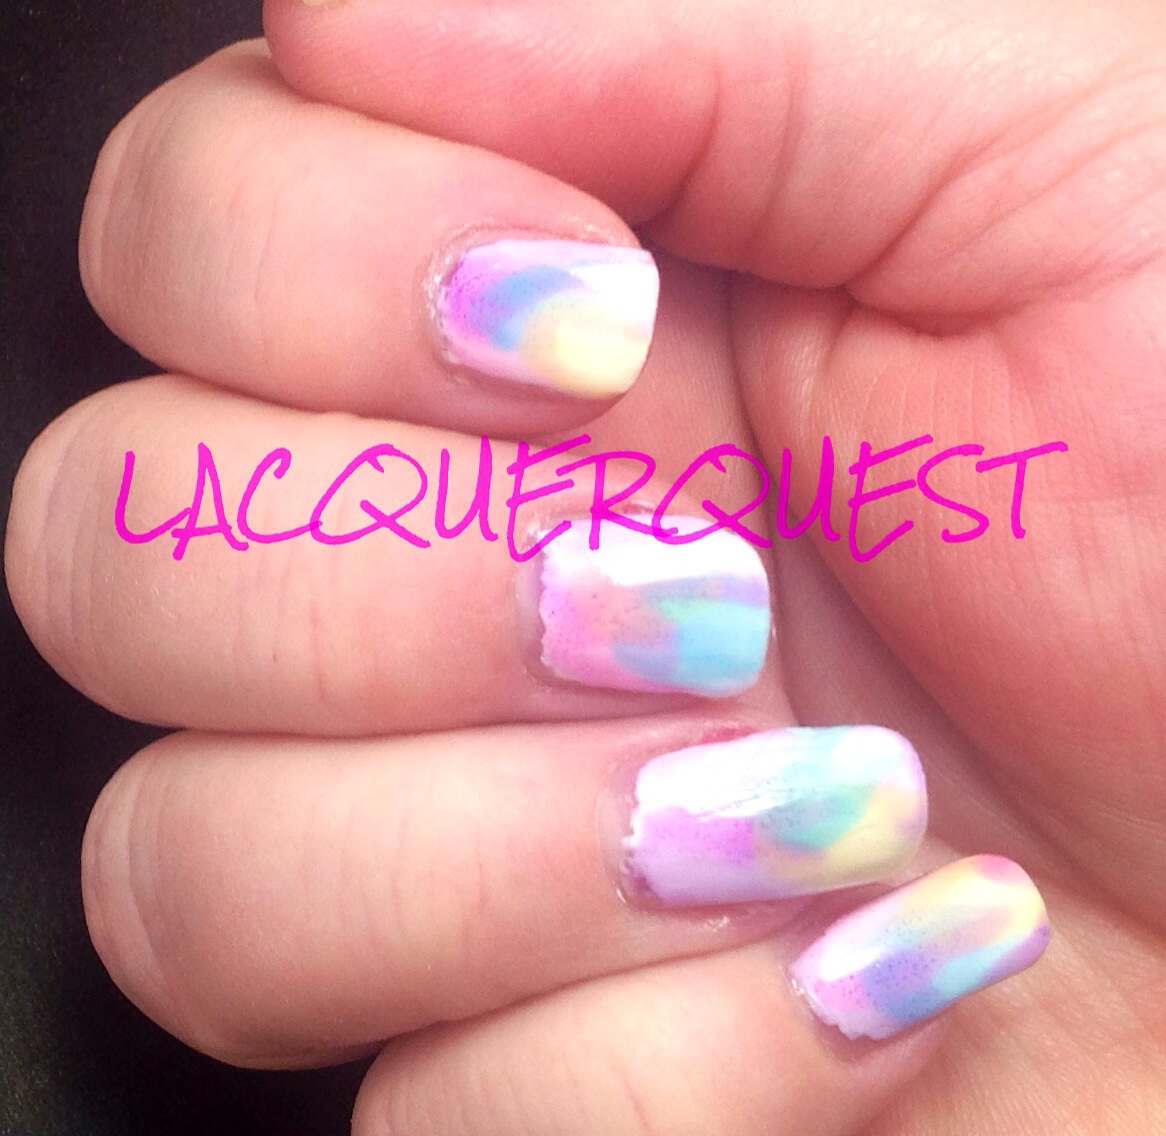
This was really easy and looks so much more impressive that it actually should. The most frequent comment was “Did you do that yourself?” Followed closely by “Are those your real nails?”. To which both of my answers are the same. “If I was paying someone to do this, I would have made them redo the white base and if I was paying for fake nails they’d at least all be the same length!” Well, that was the answer in my head. My out loud answer was a very witty “Yes.”
I started with the white undies, which is basically like primering your walls so you have an even color when you paint them a different color. Then, one by one, I just painted on streaks and strokes of each color, overlapping them to create even more colors. I should have taken a photo before the top coat because, while it looked okay, it was when I put on the Seche Vite that the magic occurred. Besides making them shine like crazy, it also blended the colors without muddying them, which was how I got the Monet effect. Please ignore the raggedy edges, I did manage to smooth them out a little the next day before I inflicted them on an unsuspecting public….
The next picture is the bottle shot. Yes, all of those different shades were created with just those four colors!

My verdict on the Sheer Tints is resoundingly positive! Once my nails grow back (more on that later), I want to really play around with some different techniques and some monochromatic stuff. At some point I’ll probably add an additional review showing how all of the colors look by themselves rather than blended. I should have done that before, but didn’t think of it until now and, honestly, I wouldn’t really have had the time lately anyway.
